HAEIR
Abnormal filter - Go to Alarm Value Settings and lower +P Range from 70 to 50
NOTES FROM SIMON (Click To
Switching on/off
If the cabinet if fully powered off the led under the power button will be red. To turn on press the power button for 5 seconds, the led should then turn green. Raise the sash to the level of the blue dot on the right side of the sash. The cabinet then goes through a warm up sequence for 3 mins. The flows should then be displayed on the home screen.
The cabinet flows stop when the sash is lowered into the closed position.
Setting the airflow in standard or smart
The cabinet can be set up to run auto flow mode (smart mode) or fixed flow mode (standard). We have found the airflows to be unstable if the cabinet is set in smart mode which is automatic flow control. If the cabinet is set in standard mode the flows are fixed and stable. An easy check to see if the cabinet is in smart mode is to look for outline of a head in the top right corner of the run screen.
Method of changing mode
Set the cabinet running
Press Spanner, OK and Right arrow together for 5 secs
Enter the pass code 2012 using the arrow and OK keys
This is now in administrator mode
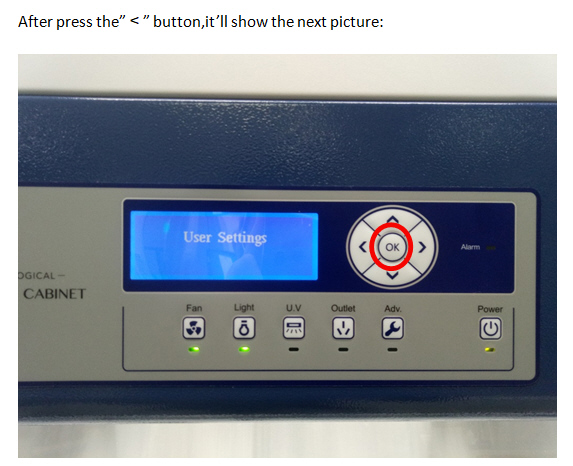
Scroll down using the down arrow until 'user settings’ is located and press 'OK’
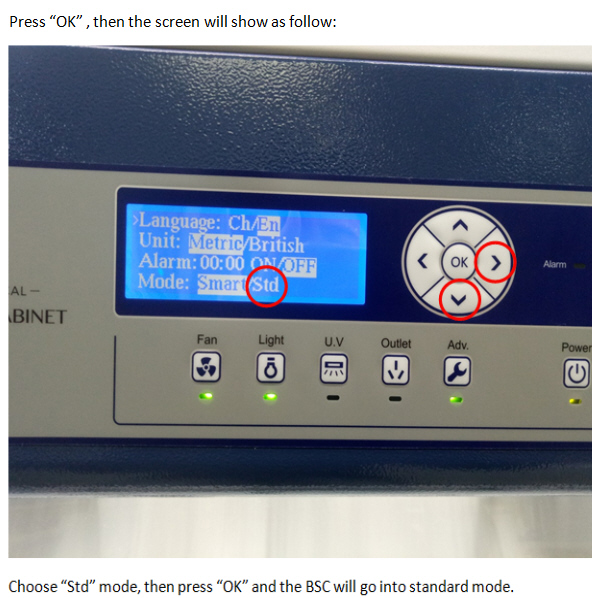
Scroll down until “Mode” and press 'OK'
Move using the left/right arrows till over SMART/STD then using arrows set to 'STD’
Scroll down until you get to return and press 'OK’
This is now back in administrator mode
Setting Fan speed
In administrator mode scroll down to 'Fan setup’ and press 'OK’
Scroll down to DC INT FAN PWM and the value can be 0-207. That represents the downflow fan speed.
A typical fan speed is 114
Use the arrows and OK buttons to make the adjustments if required.
In that same menu scroll down to DC EXT FAN PWM and this value can also be 0-207 and this represents the exhaust fan speed
A typical value is 133
Using the arrows and OK make any adjustments as required.
Scroll down to exit and press 'OK’
Safe to exit 'YES’ and 'OK’
This is now back to the HOME screen
ONLY WHEN YOU HAVE PRESSED EXIT WILL THE CHANGES TAKE EFFECT
Setting up the alarm setpoints
Downflow setting of BIAS setpoint
Exit out of the administrator screen to the home screen, we need to measure the downflow and calculate the average
To enter the administrator screen again
Press Spanner OK and Right arrow together for 5 secs
Enter the pass code 2012 using the arrow and OK keys
You are now back in the administrator screen
Scroll down to 'sensor value bias’ and press OK
Scroll down to 'downflow bias’ and press OK. Adjust the value to the value as per example below.
Press 'OK’
An example of how to do this is seen below:-
Measured df average = 0.40m/s
Screen reading = 0.36m/s
Current value in downflow bias = -0.05m/s
The screen reading needs to increase by 0.04m/s so the downflow bias value needs changing to -0.01m/s
Press 'OK’ and return to the Home screen to observe if screen reading is now displaying the actual reading .
Inflow setting of BIAS setpoint
To enter the administrator screen again
Press Spanner OK and Right arrow together for 5 secs
Enter the pass code 2012 using the arrow and 'OK’ keys
You are now back in the administrator screen
Scroll down to 'sensor value bias’ and press 'OK’
Scroll down to Inflow bias and press 'OK'. Adjust the value to the value as per example below.
Press 'OK’
An example of how to do this is seen below:-
Measured Inflow average = 0.55m/s
Screen reading = 0.51m/s
Current value in Inflow bias = -0.08m/s
The screen reading needs to increase by 0.04m/s so the inflow bias needs changing to -0.04m/s
Return to the home screen and observe that the inflow screen reading is as per actual reading.
Downflow alarm setpoint is set 0.25-0.5 m/s
Inflow alarm setpoint 0.4 and 1.0 m/s
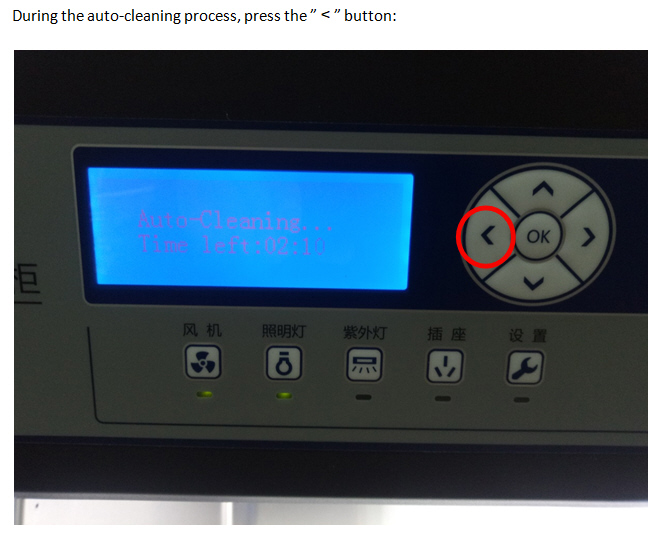
TO SWITCH FROM SAFE MODE